Painter's tape can be your best friend when painting baseboard, trim, and ceilings. But it's time to roll out the tape for other projects, like creating intricate patterns and details. Whether you're working on walls, furniture, or even rugs, here are five other ways to use the tape.
1. Cover it
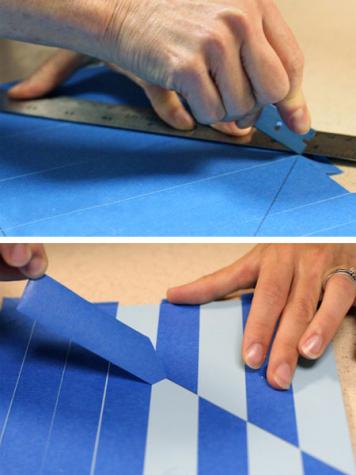
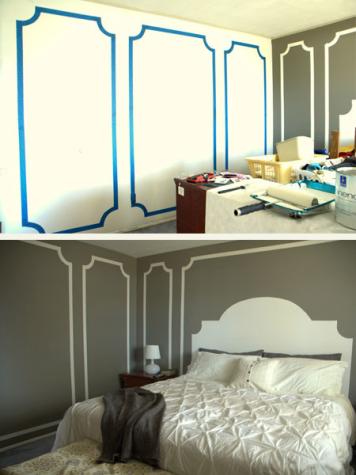
Don't let cutting painter's tape be a daunting task. To guarantee straight edges in your design, cover the entire surface you want to detail by laying down strips of tape side by side. Now break out a ruler and pencil. Measure and mark your pattern on the tape, and carefully use a craft knife or a utility knife to cut out the spaces you want to paint. Peel and paint.
2. Stencil it
Tear long strips of tape and stick them on wax paper. Use a ruler and pencil to sketch your stencil on the tape, and then cut out the desired spaces. When you're ready to place the stencil, just peel off the wax paper. Make one large stencil or space out your strips to make smaller shapes.
3. Curve it
To sculpt a perfect slope, sketch the curve you'd like to follow onto your work surface. Then cut small strips of tape and align them on the curve. For a quicker trick, simply stick a piece of tape on the edge of a plate (or any round object), trace the curve, and cut.
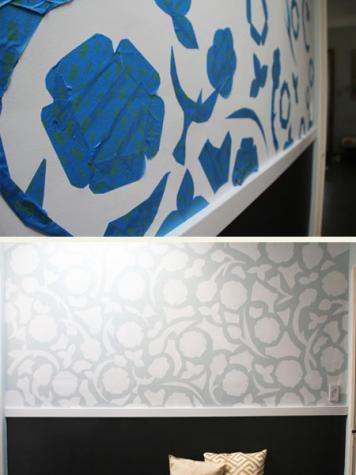
4. Freehand it
Not looking for a cookie-cutter design? Rip, cut, and piece together tape to create totally unique shapes. Or, make a personalized pattern. The flowers, branches, and leaves of this wall mural are made up of smaller, easily-assembled shapes.
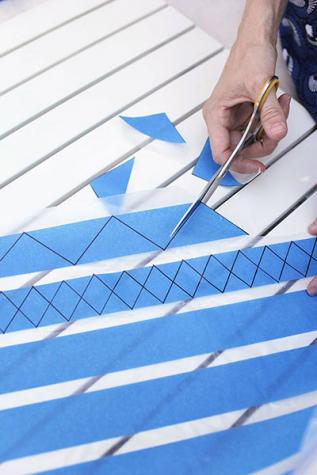
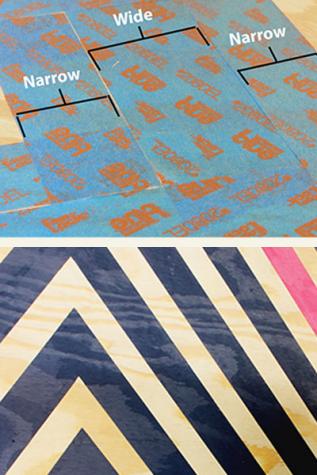
5. Space it
The simplest way to precisely space stripes—no ruler required—is to measure them out with tape. Choose a tape that's as wide as you'd like your primary stripes to be. Now choose a tape for the background or opposing stripes. Lay down strips in alternating widths until the entire area you want to paint is covered. Remove the strips for your primary stripes, and paint away.